Project
For this project you will demonstrate what you know about the color to create a Name Color Wheel Project. See examples below:
After looking at these examples, what do you notice about them?
- Do you see the primary colors?
- Where are the secondary colors?
- What color are the letters?
- Do you see the complimentary colors? Where?
1.) Drawing Your Name
To create this project we have to first draw everything in pencil before we begin painting. The first thing you need to do is write your name. Your name has to be written in block letters so they can be painted. Check out the instructions below and practice writing your name in box letters on a practice page first.
Write your name as large as you can to fill your entire page. Make sure you name is centered on the paper and you have erased all the unnecessary lines.
2.) Draw and Paint the Background
Next you will follow each of these steps to create your color wheel on top of your name. You will be painting with the watercolors and same technique you used on the color wheel you made in lesson #2. You will start with the primary colors and mix the Secondary colors. Don't forget not to paint your name yet!!
3.) Painting Your Name
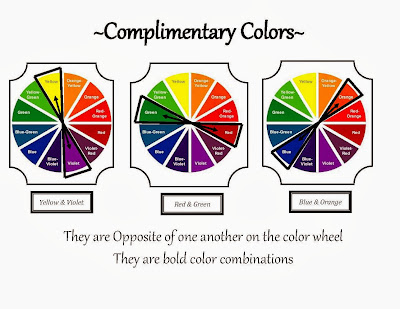
As you noticed in the project examples, the letters are painted with the corresponding complementary color. For example, the part of each letter in the green section are painted red while the letters in the red section are painted green. Complimentary colors are opposite one another on the color wheel, they are bold combinations and include: red & green, blue & orange, and yellow & purple. Each combination has one primary color paired with a secondary color. These colors are also known as best friend colors because they go so well together!


.jpg)

No comments:
Post a Comment